Cassandra 数据库的监控方案
本文主要讲解 Cassandra 数据库的监控方案,以及部署过程,
主要由 Prometheus 进行数据采集、数据存储、数据处理,而 Grafana 则是用于监控页面展示。
基本概念
Prometheus 简介
Prometheus 是一个开源的监控框架,它通过不同的组件完成数据的采集,数据的存储,告警,其中 Prometheus server 只提供了数据存储(time series data),数据的处理(提供了丰富的查询语法[查询,统计,聚合等等]),数据则通过众多的插件(prometheus 称之为exporters)来暴露一个 http 服务的接口给 Prometheus 定时抓取, 告警则通过 Altermanger。
Prometheus 目前只能通过 PULL 的方式来获取数据
官方支持以下数据源:
- Prometheus
- Graphite
- InfluxDB
- OpenTSDB
- MySQL
- Elasticsearch
- CloudWatch
- KairosDB
监控系统部署
项目路径 /work/cassandra
1 | # pwd |
监控系统部署分为以下几个步骤:
- 准备安装包
- 安装
JMX exporter - 安装 Prometheus
- 安装 Grafana
- 导入 Dashboard
- 效果展示
准备安装包
jmx_prometheus_javaagent 下载启用 JMX exporter
启用 JMX exporter 需要在对 Cassandra 数据库集群各个节点操作。
服务器列表
- 192.168.1.66
- 192.168.1.67
- 192.168.1.78
拷贝
jmx_prometheus_javaagent-0.12.0.jar文件到${CASSANDRA_HOME}/lib1
2
3
4
5#
# cp jmx_prometheus_javaagent-0.12.0.jar ${CASSANDRA_HOME}/lib
#
# chown cassandra.cassandra ${CASSANDRA_HOME}/lib/jmx_prometheus_javaagent-0.12.0.jar
#${CASSANDRA_HOME}/conf新增 jmx.yaml 配置1
2
3
4
5
6
7
8
9
10
11
12
13
14
15
16
17
18
19
20
21
22
23
24
25
26
27
28
29
30
31
32
33
34
35
36
37
38
39
40
41
42
43
44
45
46
47
48
49
50
51
52
53
54
55
56
57
58lowercaseOutputLabelNames: true
lowercaseOutputName: true
whitelistObjectNames: ["org.apache.cassandra.metrics:*"]
# ColumnFamily is an alias for Table metrics
blacklistObjectNames: ["org.apache.cassandra.metrics:type=ColumnFamily,*"]
rules:
# Generic gauges with 0-2 labels
- pattern: org.apache.cassandra.metrics<type=(\S*)(?:, ((?!scope)\S*)=(\S*))?(?:, scope=(\S*))?, name=(\S*)><>Value
name: cassandra_$1_$5
type: GAUGE
labels:
"$1": "$4"
"$2": "$3"
#
# Emulate Prometheus 'Summary' metrics for the exported 'Histogram's.
# TotalLatency is the sum of all latencies since server start
#
- pattern: org.apache.cassandra.metrics<type=(\S*)(?:, ((?!scope)\S*)=(\S*))?(?:, scope=(\S*))?, name=(.+)?(?:Total)(Latency)><>Count
name: cassandra_$1_$5$6_seconds_sum
type: UNTYPED
labels:
"$1": "$4"
"$2": "$3"
# Convert microseconds to seconds
valueFactor: 0.000001
- pattern: org.apache.cassandra.metrics<type=(\S*)(?:, ((?!scope)\S*)=(\S*))?(?:, scope=(\S*))?, name=((?:.+)?(?:Latency))><>Count
name: cassandra_$1_$5_seconds_count
type: UNTYPED
labels:
"$1": "$4"
"$2": "$3"
- pattern: org.apache.cassandra.metrics<type=(\S*)(?:, ((?!scope)\S*)=(\S*))?(?:, scope=(\S*))?, name=(.+)><>Count
name: cassandra_$1_$5_count
type: UNTYPED
labels:
"$1": "$4"
"$2": "$3"
- pattern: org.apache.cassandra.metrics<type=(\S*)(?:, ((?!scope)\S*)=(\S*))?(?:, scope=(\S*))?, name=((?:.+)?(?:Latency))><>(\d+)thPercentile
name: cassandra_$1_$5_seconds
type: GAUGE
labels:
"$1": "$4"
"$2": "$3"
quantile: "0.$6"
# Convert microseconds to seconds
valueFactor: 0.000001
- pattern: org.apache.cassandra.metrics<type=(\S*)(?:, ((?!scope)\S*)=(\S*))?(?:, scope=(\S*))?, name=(.+)><>(\d+)thPercentile
name: cassandra_$1_$5
type: GAUGE
labels:
"$1": "$4"
"$2": "$3"
quantile: "0.$6"${CASSANDRA_HOME}/conf/cassandra-env.sh增加启动参数1
JVM_OPTS="$JVM_OPTS -javaagent:${CASSANDRA_HOME}/lib/jmx_prometheus_javaagent-0.12.0.jar=7070:${CASSANDRA_HOME}/conf/jmx.yaml"
如下图所示:

重启 Cassandra 数据库服务
1
2
3
4# su cassandra
$ cd ${CASSANDRA_HOME}
$ ./stop.sh
$ ./start.sh验证
1
2
3
4# curl 192.168.1.78:7070 > collection.txt
% Total % Received % Xferd Average Speed Time Time Time Current
Dload Upload Total Spent Left Speed
100 826k 100 826k 0 0 632k 0 0:00:01 0:00:01 --:--:-- 632k
安装 Prometheus
项目路径: /work/prometheus
服务地址: 192.168.1.15:9090
1 | # pwd |
新建 conf/prometheus.yml 文件
1
2
3
4
5
6
7
8
9
10
11
12
13
14
15
16
17
18
19
20
21
22
23
24
25prometheus.yml
global:
scrape_interval: 15s # By default, scrape targets every 15 seconds.
evaluation_interval: 15s # By default, scrape targets every 15 seconds.
# scrape_timeout is set to the global default (10s).
external_labels:
cluster: 'test-cluster'
monitor: "prometheus"
alerting:
alertmanagers:
- static_configs:
- targets:
- '192.168.1.234:9093'
scrape_configs:
- job_name: 'cassandra'
scrape_interval: 15s
#honor_labels: true # don't overwrite job & instance labels
static_configs:
- targets:
- '192.168.1.66:7070'
- '192.168.1.67:7070'
- '192.168.1.78:7070'新建启动脚本
/work/prometheus/run_prometheus.sh1
2
3
4
5
6
7
8
9
10
11
12
13
14
15
16
17
18
19
set -e
ulimit -n 1000000
DEPLOY_DIR=/work/prometheus
cd "${DEPLOY_DIR}" || exit 1
# WARNING: This file was auto-generated. Do not edit!
# All your edit might be overwritten!
exec > >(tee -i -a "/work/prometheus/log/prometheus.log")
exec 2>&1
exec bin/prometheus \
--config.file="/work/prometheus/conf/prometheus.yml" \
--web.listen-address=":9090" \
--web.external-url="http://192.168.1.15:9090/" \
--web.enable-admin-api \
--log.level="info" \
--storage.tsdb.path="/work/prometheus启动 prometheus 服务
1
$ sh run_prometheus.sh
安装 Grafana
项目路径:
/work/gafana
服务地址:192.168.1.15:30001
2
3
4
5
6# pwd
/work/gafana
#
# ls
bin conf log opt
# 注意: opt/grafana 是 Grafana 服务路径编辑
/work/gafana/conf/grafana.ini配置文件1
2
3
4
5
6
7
8
9
10
11
12
13
14
15
16
17[paths]
data = /work/gafana/data.grafana
logs = /work/gafana/log
plugins = /work/gafana/opt/grafana/plugins
[server]
http_port = 3000
domain = 192.168.1.15
check_for_updates = true
[security]
admin_user = admin
admin_password = admin
[log.file]
level = info
format = text
[dashboards.json]
enabled = false
path = /work/grafana/opt/grafana/dashboards新建启动脚本
/work/prometheus/run_grafana.sh1
2
3
4
5
6
7
8
9
10
11
12
13
set -e
ulimit -n 1000000
# WARNING: This file was auto-generated. Do not edit!
# All your edit might be overwritten!
DEPLOY_DIR=/work/grafana
cd "${DEPLOY_DIR}" || exit 1
LANG=en_US.UTF-8 \
exec opt/grafana/bin/grafana-server \
--homepath="/work/grafana/opt/grafana" \
--config="/work/grafana/opt/grafana/conf/grafana.ini"启动 Grafana
1
# run_grafana.sh
导入 Dashboard
Cassandra-DashBoard 下载

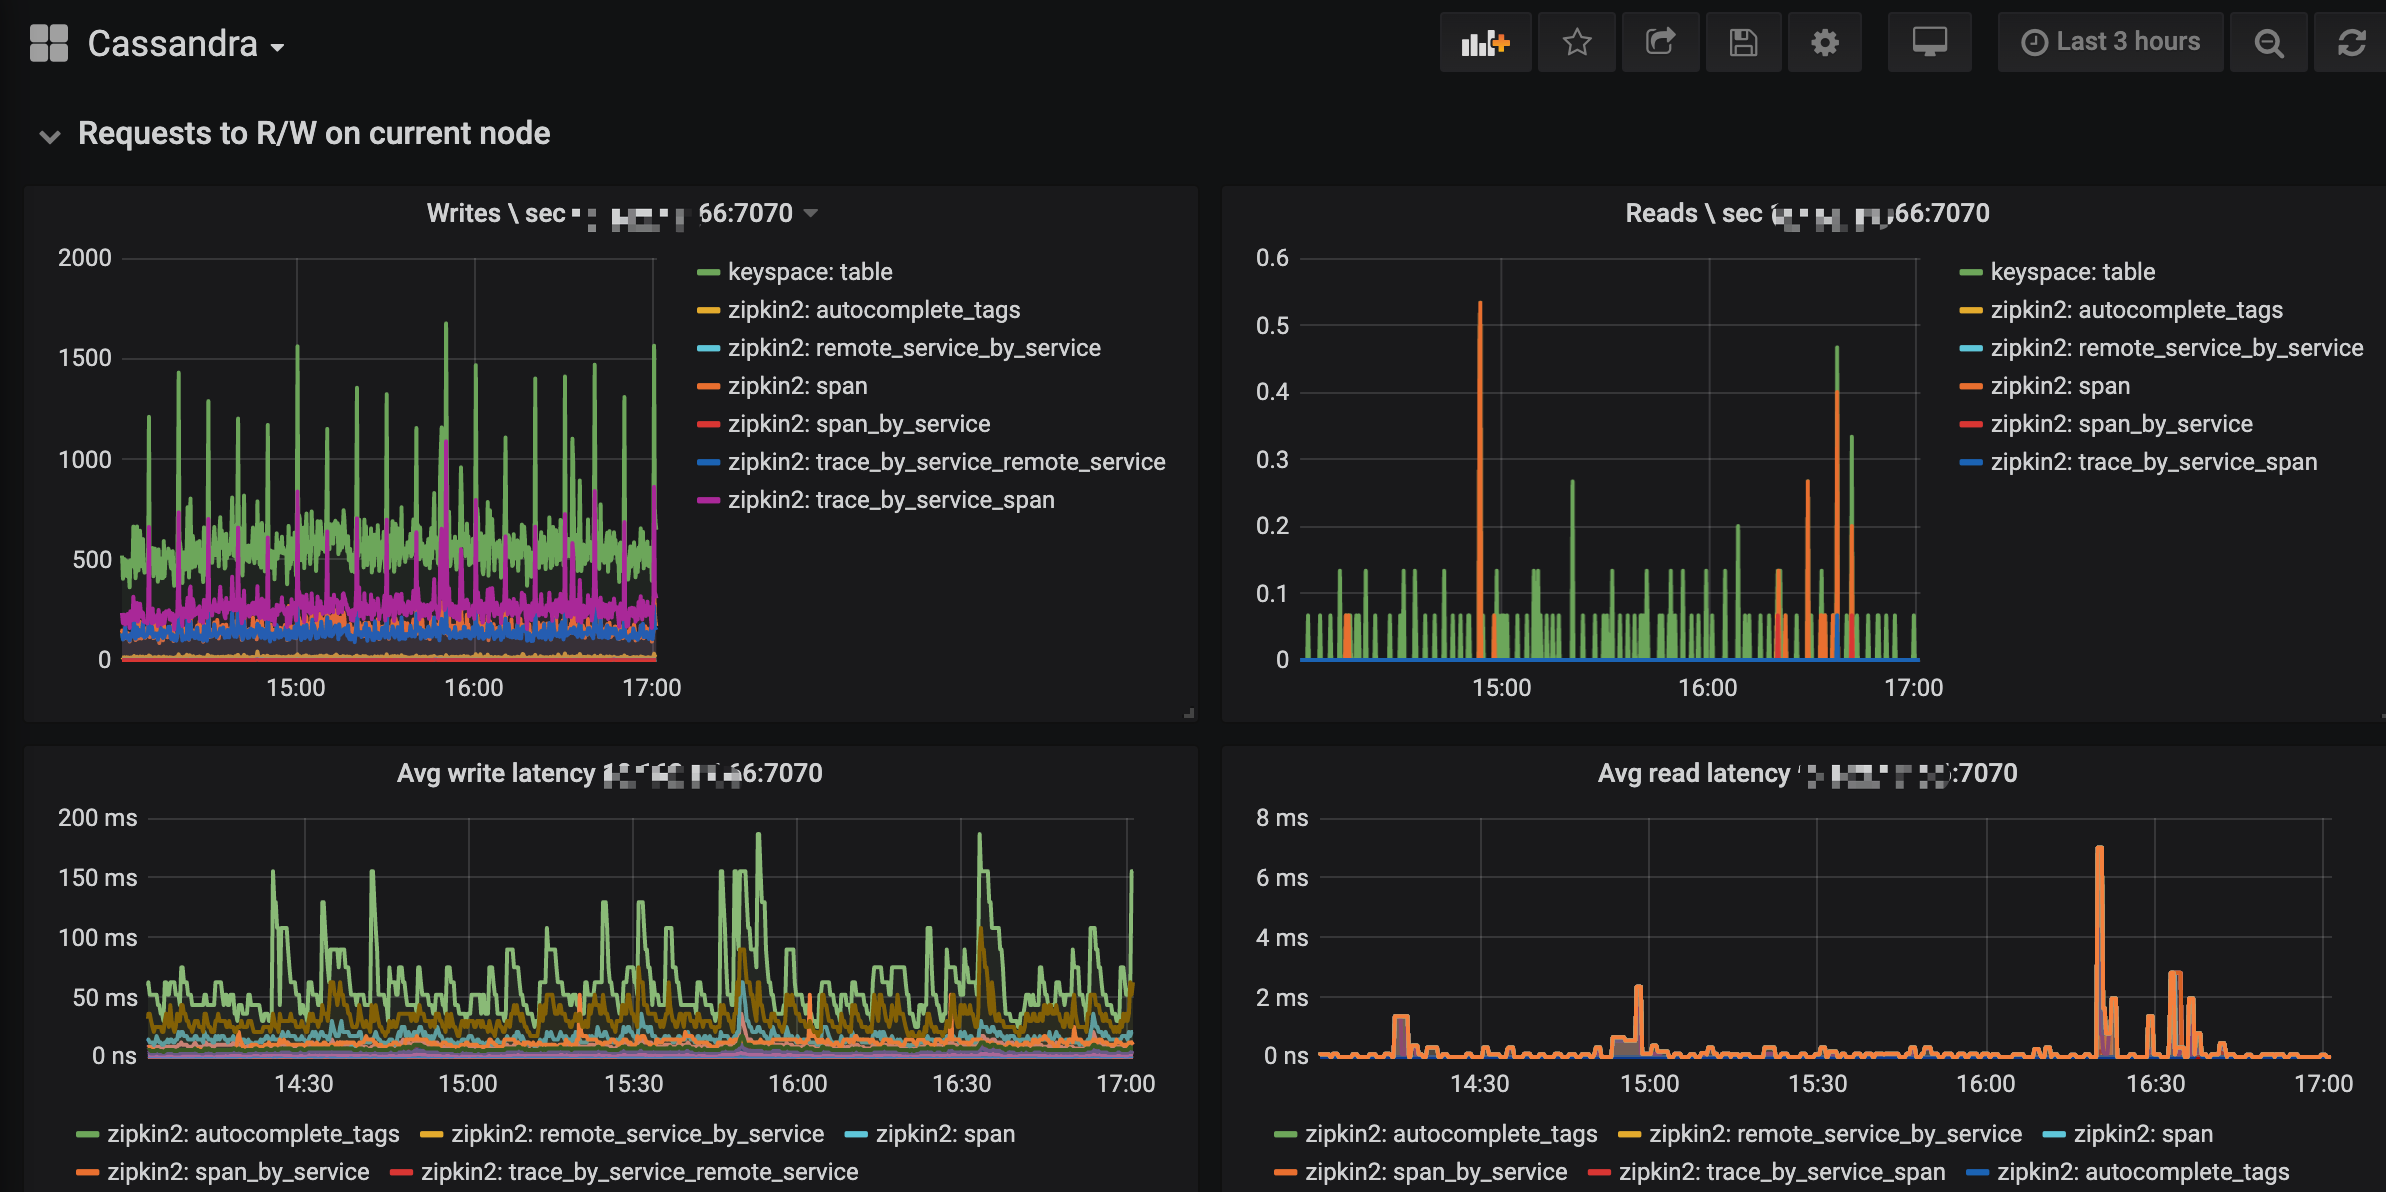
效果展示
